1. User Authentication
Only authenticated users can access the ntopng web GUI. After a successful authentication, ntopng creates an authenticated session and send it to the web user inside an HTTP cookie. From that point on, the web user will be able to transmit the received session back to ntopng inside another HTTP cookie along with every request made. ntopng, upon seeing the session, will recognize the user and consider he/she as authenticated.
Session handling is generally done automatically by the web browser of the user. This means that cookie handling and session transmission will be transparent to the web user and handled behind the scenes.
Authenticated sessions have a duration. After an amount of time equal to the session duration, the session is terminated and ntopng will no longer recognize it, requiring the web user to re-authenticate again.
The session duration is configurable as shown in the following picture and can go from 1 minute up to 7 days. The shorter the session duration, the more secure the ntopng accesses are. Indeed, a compromised session could be used by an attacker for the whole duration time. It is up to the administrator to choose a duration that can guarantee enough security, depending on the environment of the operations. The administrator can also decide to terminate all the active sessions at midnight, simply by toggling the preference shown in the figure. This will force all the web users to re-authenticate again, regardless of their residual session duration.
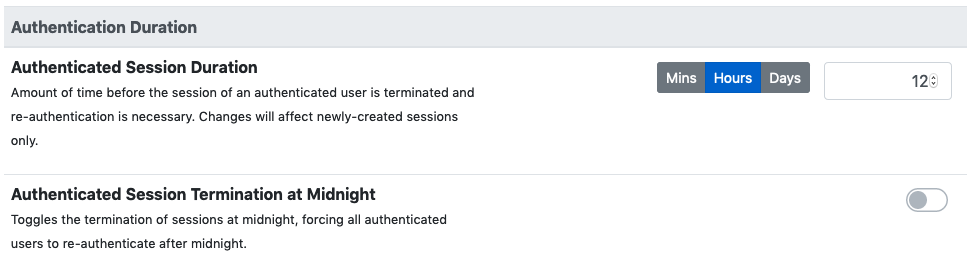
ntopng Authentication Duration
ntopng supports multiple methods to authenticate users into the ntopng GUI. Individual methods can be enabled from the ntopng “User Authentication” preferences.
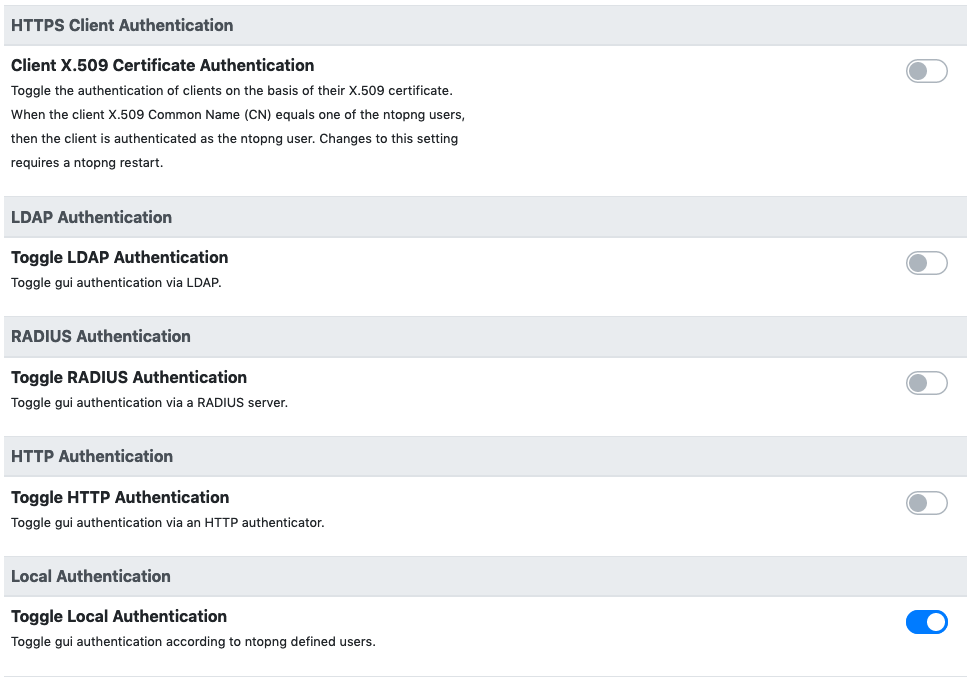
ntopng Authentication Methods
It is possible to enabled more than one method at once. In this case, when a user tries to authenticate, the enabled authentication methods will be tried in the same top-down order as they are listed in the preferences. If at least one of the authentication methods succeeds, then the user is allowed to access the web GUI.
1.1. Local Authentication
This is the authentication method enabled by default when ntopng is installed. It will use the users credentials configured via the ntopng GUI to authenticate new users.
1.2. LDAP Authentication
An LDAP server can be used to authenticate users.
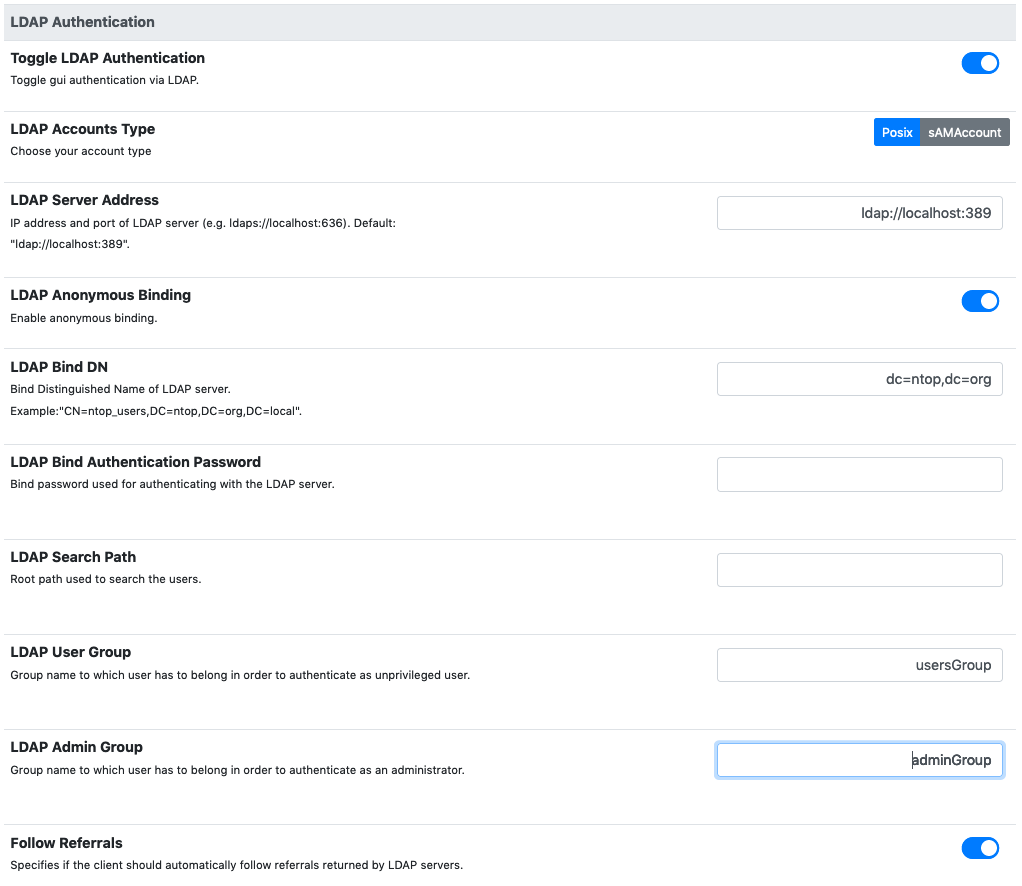
LDAP Authentication Settings
Here is an overview of the different parameters:
- LDAP Accounts Type: can be used to choose for the POSIX based accounts or the sAMAccount accounts.
- LDAP Server Address: the address of the LDAP server. Ports 389 and 636 are the default ports for ldap and ldaps, respectively.
- LDAP Anonymous Binding: based on the LDAP server configuration, performing an LDAP binding request (needed to communicate with the LDAP server) may or may not require authentication. If anonymous binding is disabled, then explicit credentials must be supplied.
- LDAP Search Path: this indicates the root path where users and groups information are located and is used by ntopng during the login.
- LDAP User Group: the value for the “memberOf” user attribute used to identify normal users (without privileges). See the readme at the end of this section for more information.
- LDAP Admin Group: the value for the “memberOf” user attribute used to identify admin users (with privileges). See the readme at the end of this section for more information.
On a Linux client, it is possible to test the connection to the LDAP server with the following commands.
If anonymous binding is enabled:
ldapsearch -x -h ldap_server_ip -b 'dc=mydomain,dc=org' -s sub "(objectclass=*)"
otherwise:
ldapsearch -h ldap_server_ip -D 'cn=binding_user,dc=mydomain,dc=org' -w binding_password -b 'dc=mydomain,dc=org' -s sub "(objectclass=*)"
The parameters above should be modified according to the actual configuration in use. It is important to configure the LDAP server properly in order to correctly expose the necessary group metadata to ntopng, otherwise authentication will not work properly. Read the next paragraph for recommendations to be applied to an OpenLDAP server for ntopng communication.
A detailed blog post that discusses LDAP authentication and shows how to configure an LDAP server can be found at: https://www.ntop.org/ntopng/remote-ntopng-authentication-with-radius-and-ldap/
1.2.1. OpenLDAP as Active Directory proxy
When using the sAMAccount account type in combination with OpenLDAP as an Active Directory proxy, ntopng authentication will not work because the “memberOf” attribute used by ntopng is not found. In fact, OpenLDAP does not understand the “memberOf” attribute of AD and so it creates a MEMBEROF (uppercase) pseudo attribute, which is not standard.
In order to make this setup work properly, the following should be added to the OpenLDAP config:
attributetype ( 1.2.840.113556.1.2.102
  NAME 'memberOf'
  SYNTAX '1.3.6.1.4.1.1466.115.121.1.12'
)
When using POSIX accounts, the LDAP server should be configured as follows in order to work correctly with ntopng:
- Into the LDAP user configuration, note down the “uid” parameter (called “User Name” in OpenLDAP, not to be confused with “UidNumber”). You will need it below.
- Into the LDAP group configuration, you should add a new custom field “memberUid”, with the same value of the user “uid” field above.
As an example, supposing there is a group “usersGroup” and a user “ntopngUser” as uid, a new field “memberUid” should be added to the “usersGroup” configuration with “ntopngUser” as value.
The memberUid (ntopngUser in this case) is the username to use for the ntopng authentication.
1.3. RADIUS Authentication
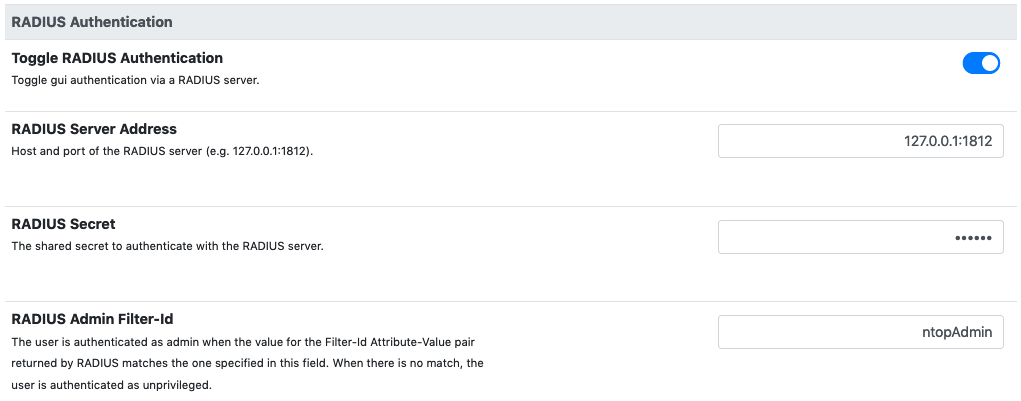
RADIUS Authentication Settings
These are the required options to setup the connection with a RADIUS authenticator:
- RADIUS Server Address: the address (IP/hostname) and port of a radius server. The default RADIUS port is 1812.
- RADIUS Secret: the secret to authenticate with the server.
- RADIUS Admin Group: the name of the admin group to be returned by radius as the value of the Filter-Id attribute to be used to identify admin users. All the other users are considered unprivileged by default.
On a Linux system, RADIUS authentication can be tested with the following command:
radtest testuser Password123 127.0.0.1 0 testing123
where:
- testuser is the username to authenticate
- Password123 is the user password
- 127.0.0.1 is the RADIUS server address
- testing123 is the RADIUS secret
Upon a successfully authentication, the command above should return the following output:
rad_recv: Access-Accept packet from host 127.0.0.1 port 1812, id=4, length=20
A detailed blog post that discusses RADIUS authentication in ntopng, and shows how to set up a RADIUS server can be found at: https://www.ntop.org/ntopng/remote-ntopng-authentication-with-radius-and-ldap/
1.3.1. Additional Notes
ntopng sends an Access-Request to the RADIUS server and, if Access-Accept is returned, the user is authenticated.
In order to distinguish between admin and normal users, a Filter-Id attribute is used (https://tools.ietf.org/html/rfc2865#section-5.11). The Filter-Id for admin users should correspond to the RADIUS Admin Group set into the ntopng RADIUS preferences.
1.3.2. Setting up a FreeRadius server
Check out https://www.packet6.com/install-freeradius-ubuntu-server. testing123 is the default secret for localhost. In order to set up the Filter-Id attribute for a user, the following lines should be added to /etc/freeradius/users
testuser Cleartext-Password := "Password123"
  Filter-Id = "ntopAdmin"
In order for authentication to work properly, testuser must actually exist as a Linux user in the system where FreeRadius is installed.
1.4. HTTP Authentication
Ntopng also supports authentication via HTTP POST requests. In this case, and JSON data

HTTP Authentication Settings
The only needed parameter is HTTP Server URL. Here is a description of the API:
- when a user tries to authenticate, ntopng will send a POST request to the above URL with JSON data with two fields: user, the username to authenticate, password its password
- the authenticator will respond with the HTTP code 200 if the authentication is successfully, otherwise another (unspecified) code is returned.
- in case 200 is returned, JSON data will be sent back to the ntopng server. If this data contains a admin = True pair, then the given user is authenticated as admin. Otherwise, it is authenticated as a normal unprivileged user.
On a Linux system, it’s possible to test an HTTP authenticator implementation with the curl command:
curl --header "Content-Type: application/json" --request POST --data '{"user":"test-user","password":"test-password"}' -v http://localhost:3001
This will try to authenticate a user called test-user with a password test-password on a local http authenticator running on port 3001.
The following link provides some information on how to setup a simple HTTP authenticator to work with ntopng: https://github.com/ntop/ntopng/blob/dev/doc/README.HTTP_AUTHENTICATOR .
1.5. Unable to Login
Instructions on how to recover after being locked out of the ntopng GUI can be found in the FAQ page.
1.6. Token based authentication
A security token is a “trusted tool“ to enter a restricted resource. It can be seen as a key that allows a user to authenticate and prove it’s identity. The logic behind the token - based authentication is simple. Token based authentication is a protocol which allow users to enter their username and password to verify their identity and in return to obtain an access token. At first,there is a request to the server that the user makes inserting login credentials. Right after comes the verification – by checking inserted credentials, the system (server) determines if the user could obtain the permission to have the access to the resource. In the end the server generates a secured, signed token for the user for unlimited duration. Once the token has been issued, it can be used instead of usual login credentials, also,in case of necessity it can be offered to other users. Does not require providing others with personal passwords and can be considered a better security measure. Moreover, token authentication uses encrypted, machine- generated code to verify the user identity.
The token in ntopng can be generated following these steps:
- Open the settings
- Go to User
- Click Edit
- Choose User Authentication Token
- Generate Token
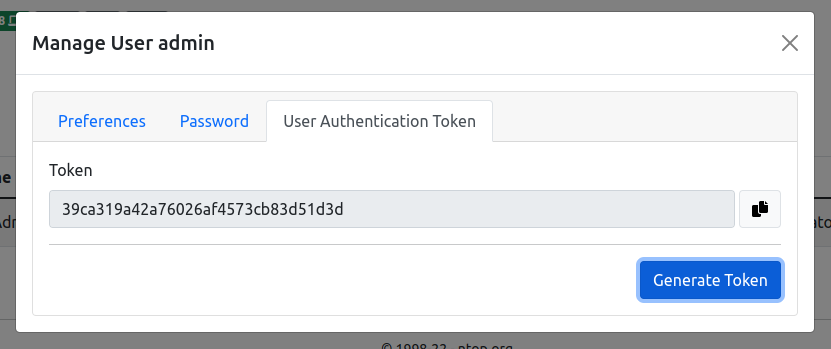
The token can be used to authenticate by setting Token as authorization method in the HTTP request, example:
Authorization: Token 39ca319a42...
You can also use this from curl as follows:
curl -v http://localhost:3000/lua/locale.lua -H 'Authorization: Token 39ca319a42...'
Please check the API documentation for further information about token usage.