In large organizations, it is common to have a centralised authentication system usually named AAA (Authentication, Authorization and Accounting). Managing users typically involves the definition and enforcement of the rights to do some operations or to access certain resources in a network. Being able to grant (or deny) such rights using a centralized authentication system is the only viable solution when it comes to dealing with large organizations with hundreds, or even thousands, of users that periodically join and leave.
AAA protocols include Remote Authentication Dial-In User Service (RADIUS) and the Lightweight Directory Access Protocol (LDAP). Supporting RADIUS and LDAP was the only way to seamlessly integrate ntopng in infrastructures with existing users and policies, in particular to avoid the need to redefine (and keep updated) ntopng web users and privileges to match the existing users in the organisation.
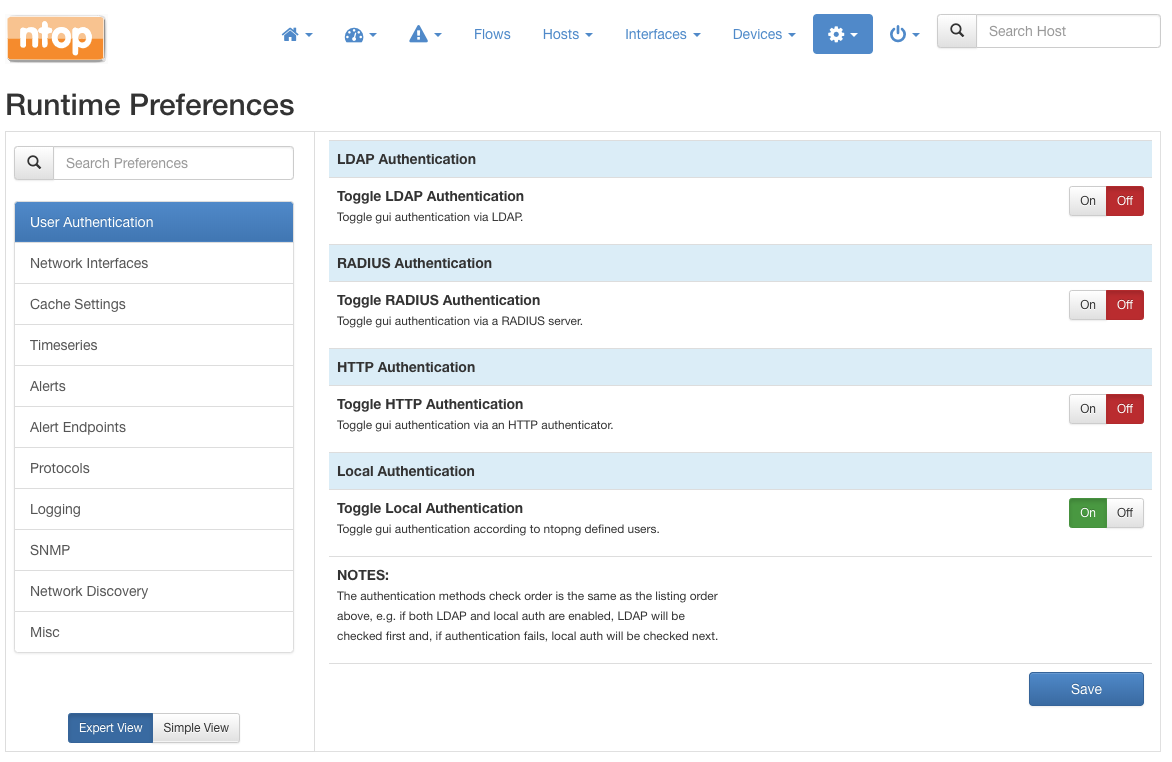
RADIUS and LDAP are included in the current dev release as well as in the forthcoming 3.8 stable release. LDAP and RADIUS can be configured from the ntopng preferences, simply by selecting tab “User Authentication” and turning the corresponding switch to “On“. Once the switch is set to “On“, a series of protocol-specific configuration properties pop up.
This post briefly shows how each of these two protocols can be configured in ntopng.
LDAP
LDAP properties that can be configured are show in the picture below.
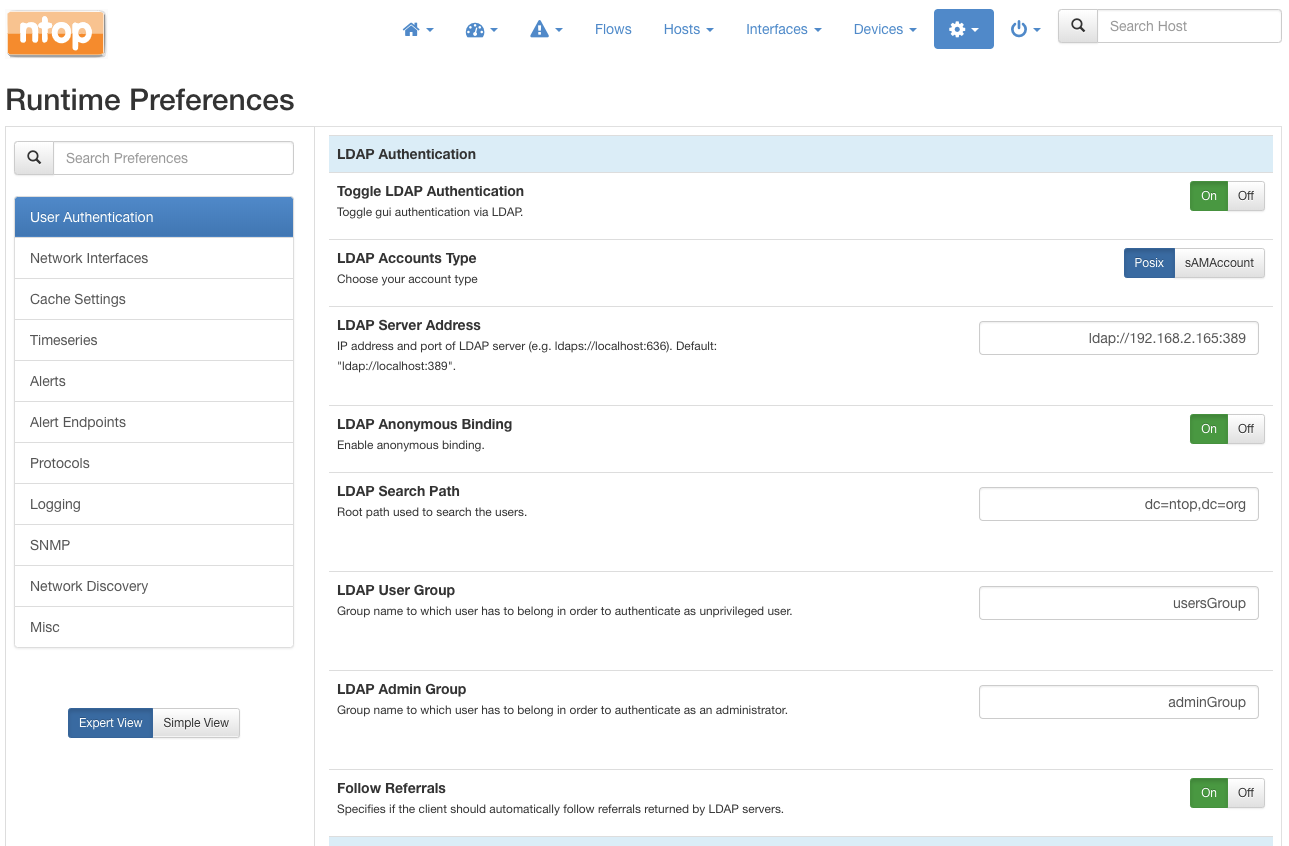
- LDAP Accounts Type allows to choose if the login should be performed in an Active Directory (AD) or in a Posix environment:
- sAMAccount should be selected in AD environments to try and verify the user logon name against attribute samAccountName.
- Posix should be selected when using attributes that are standardized according to objectclass posixAccount.
- LDAP Server Address specifies the IP address or name of the LDAP sever:
- The server must be preceded with prefix ldap:// when the connection is unencrypted or with ldaps:// when LDAP-over-SSL is enabled.
- The server must be followed by a colon and a port number that indicates the port used by the LDAP server to listen for incoming connections.
- LDAP Anonymous Binding indicates whether the server accepts anonymous binding requests or not. When the anonymous binding is disabled, a couple of extra fields appear:
- LDAP Bind DN, that is, the distinguished name used to perform the bind.
- LDAP Bind Authentication Password, that is, the password used to perform the bind.
- LDAP User Group specifies the group the user must belong to in order to be authenticated as a non-administrator ntopng user
- LDAP Admin Group specifies the group the user must belong to in order to be authenticated as an administrator ntopng user.
- Follow Referrals specifies if the client should automatically follow referrals returned by LDAP servers.
A Configuration Example of SLAPD (Standalone LDAP Daemon) with phpLDAPadmin
The installation of slapd and phpLDAPAdmin falls outside the scope of this example. There is already a tutorial that greatly explains how to setup slapd and phpLDAPadmin on ubuntu.
This example wants to show how phpLDAPadmin can be used to create a couple of users, one administrator and an unprivileged user, and let them login in ntopng with the right privileges. Specifically, the following users will be created:
- ntopadmin with admin privileges
- ntopuser with user privileges
Two groups will be associated to the created users:
- adminGroup to identify administrators
- usersGroup to identify unprivileged users
Those those groups will be added both to the LDAP server and to ntopng to make sure the corresponding users will be able to log in with the right privileges.
Step by Step Setup
Once the installation of slapd and phpLDAPadmin is completed, one can point the browser to the running phpLDAPadmin instance and indicate the Login DN and password created during the installation.
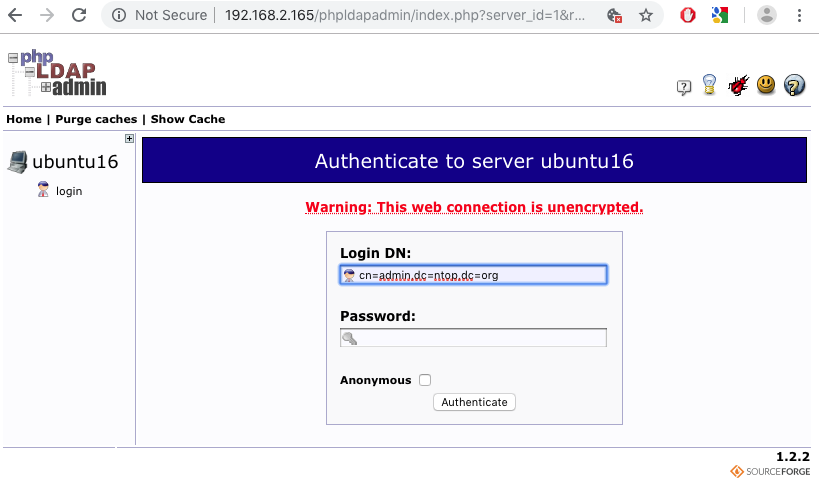
Login DN and password are the same ntopng uses for the binding that, in this case, is not anonymous. Therefore, one must also specify them in the ntopng preferences as LDAP Bind DN and LDAP Bind Authentication Password, respectively to let ntopng access the LDAP server.
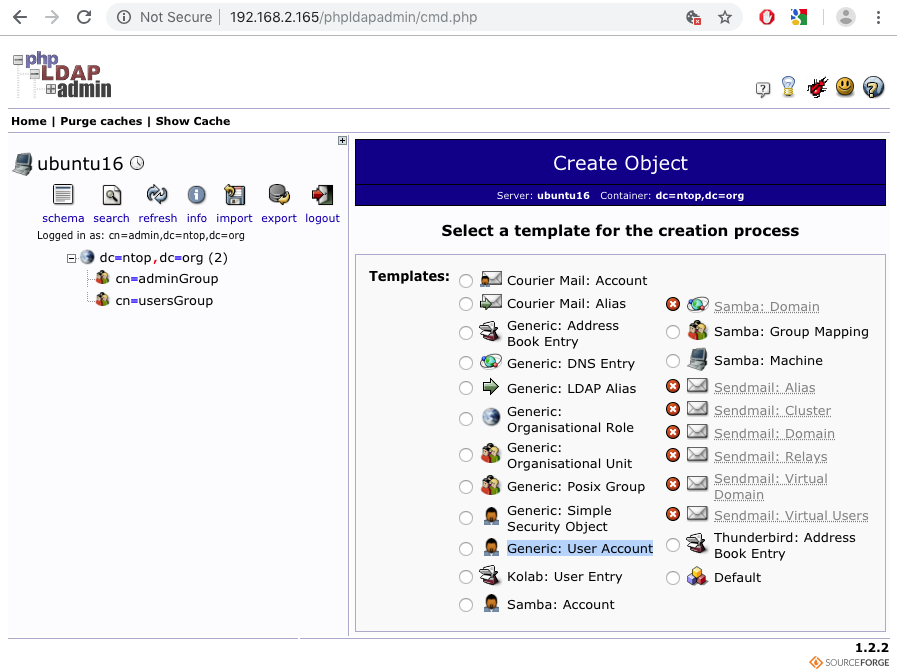
After a successful login, one will find the hierarchical LDAP tree on the left of the page, and a series of actions on the right. “Create a Child Entry” can be used to start adding users.
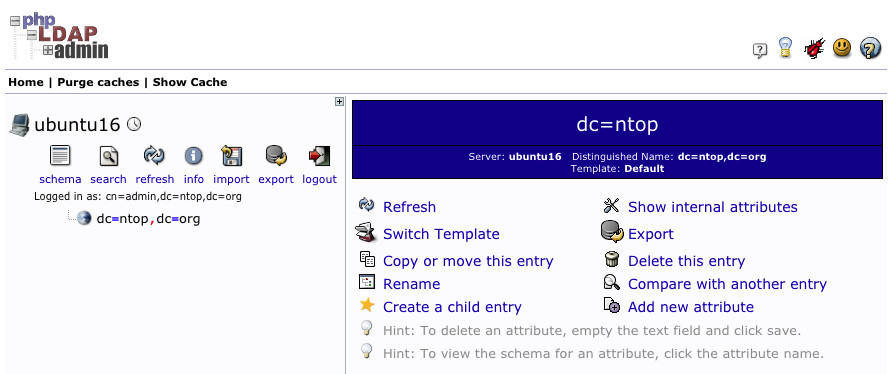
To add users one can select “Create Generic Account” after clicking on “Create a child entry“.
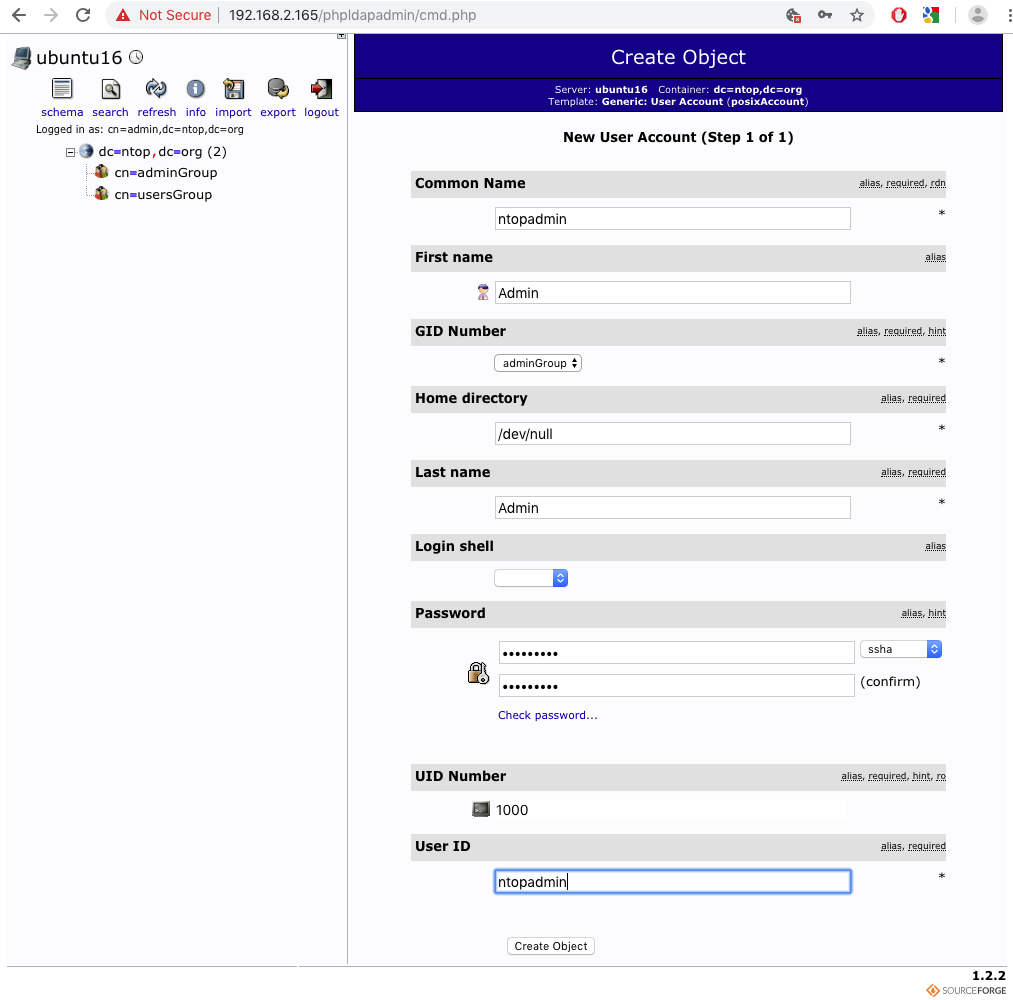
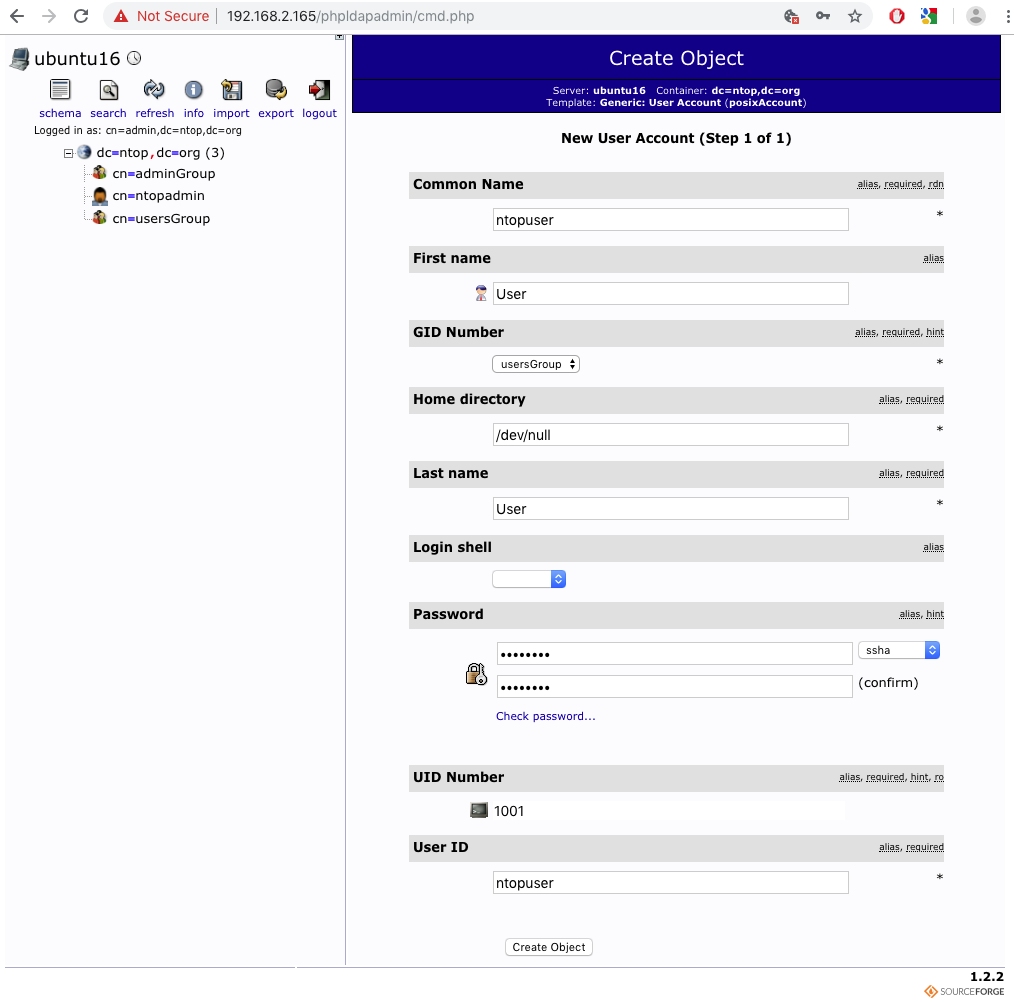
Users can then be defined simply by populating the available fields as shown below. There is nothing really special. The only important thing to note is the “Common Name” as such name is the one used by ntopng when performing the match against the submitted username.
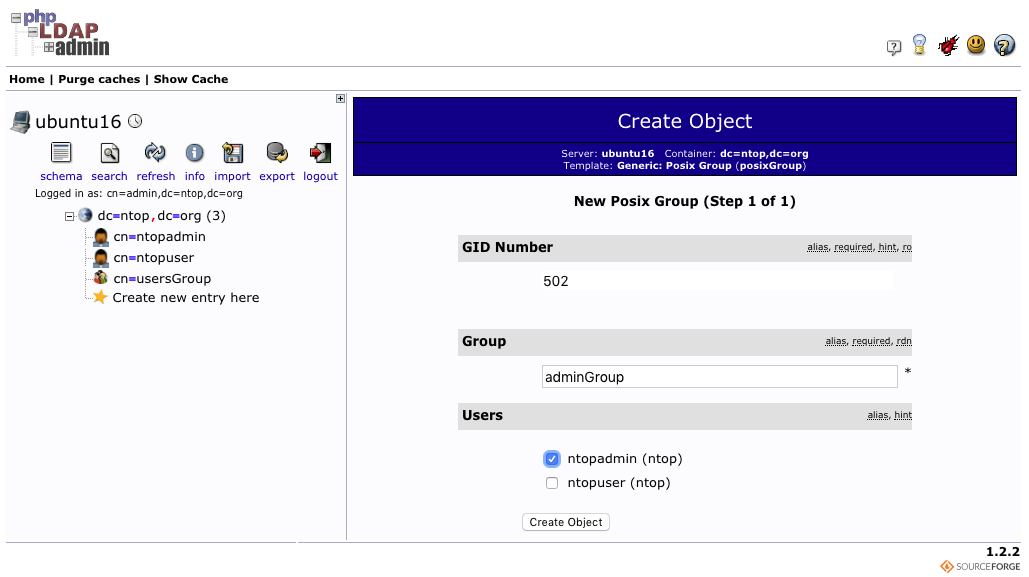
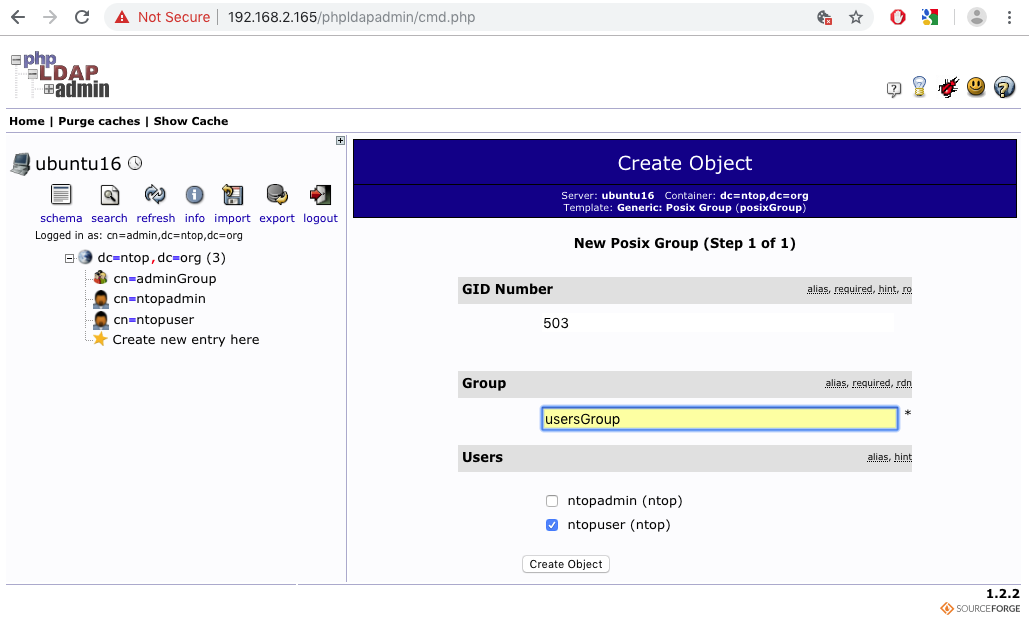
At this point users are created and it is time to add the adminGroup and usersGroup. One can create groups by selecting “Create Child Entry” and then “Generic: Posix Group“.
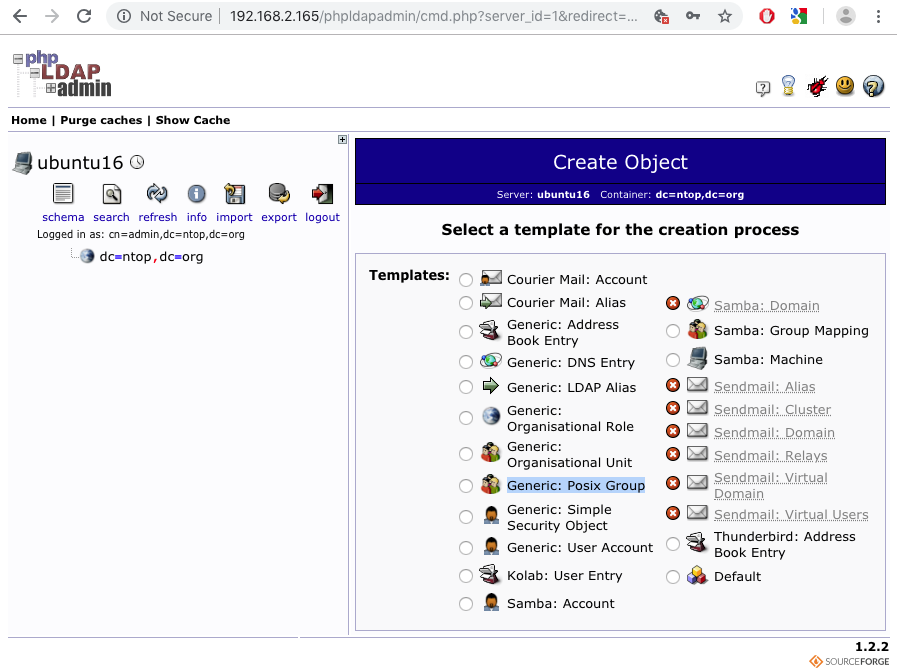
The two groups can be created simply by assigning the aforementioned names and making sure to tick the checkbox next to the user that has to be associated with the group.
Now everything is ready in phpLDAPadmin. The last thing to do is to just configure ntopng to make sure the users will be logged in as desired. The configuration is shown in the picture below
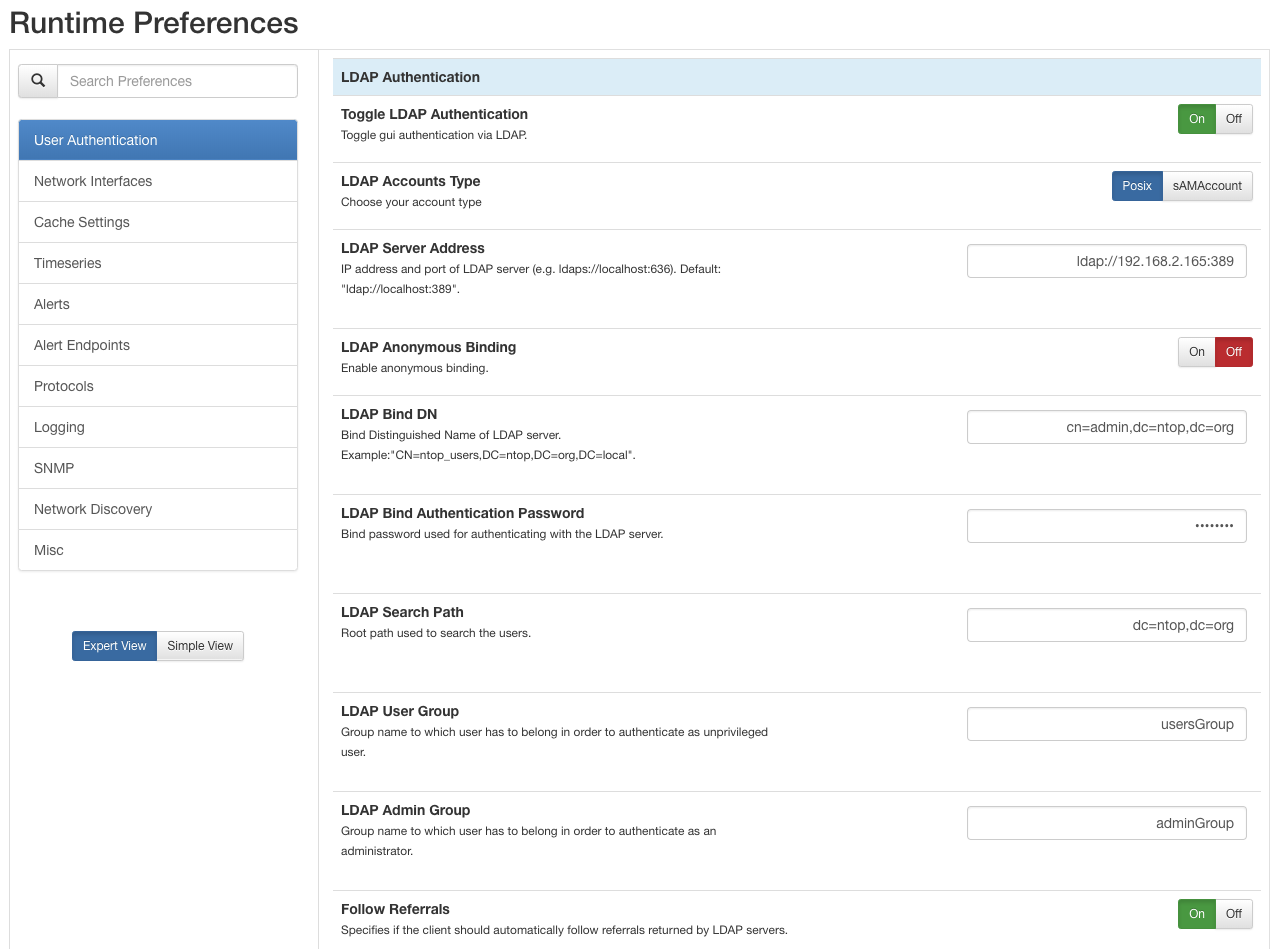
In particular, note that:
- The LDAP Bind DN and Password are those also used when authenticating to the phpLDAPadmin page.
- The names of LDAP User Group and LDAP Admin Group are the same as the group names created in phpLDAPadmin.
- Groups and users are childs of the LDAP Search Path in the tree.
RADIUS
RADIUS properties that can be configured are shown below
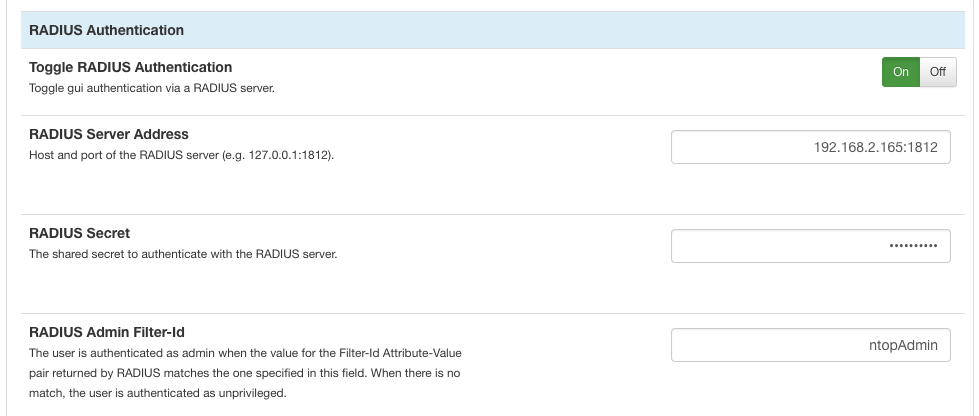
- RADIUS Server Address specifies the IP address or name of the RADIUS server and is followed by a colon and a number indicating the port on which the RADIUS server is listening.
- RADIUS Secret is the shared secret between the ntopng host and the radius server, and is used to transmit obfuscated passwords.
- RADIUS Admin Filter-Id is used to decide whether a user should be authenticated as administrator. When the value for the Filter-Id Attribute-Value pair returned by RADIUS matches the one specified in the property field, the user is authenticated as administrator, otherwise it is authenticated as unprivileged user.
A Configuration Example of a FreeRadius RADIUS Server
Installation instructions of a FreeRadius server can be found here and fall outside the scope of this example. Here it is shown how FreeRadius can be configured with two users, namely ntopadmin and ntopuser, that will log into ntopng with administrative and non-administrative privileges, respectively.
FreeRadius user are configured in file /etc/freeradius/users. For each user, a cleartext password is configured. In addition, to make sure user ntopadmin will be an administrator, an extra Filter-Id “ntopAdmin” is added for that user.
# tail /etc/freeradius/users
# #
# # Last default: shell on the local terminal server.
# #
# DEFAULT
# Service-Type = Administrative-User
# On no match, the user is denied access.
ntopuser Cleartext-Password := "Password123"
ntopadmin Cleartext-Password := "Password456"
                    Filter-Id = "ntopAdmin"
Once the user are configured, the FreeRadius server must be configured with a secret shared with the host running ntopng. Assuming such host runs with IP 192.168.2.225, file /etc/freeradius/clients.conf can be configured as
#  tail /etc/freeradius/clients.conf
client 192.168.2.225 {
secret = "testing456"
shortname = "develv5"
nastype = other
}
At this point FreeRadius can be restarted with
# /etc/init.d/freeradius restart
The last thing to do is to set up the ntopng RADIUS configuration page. Assuming the FreeRadius server has IP 192.168.2.165 and listens on the standard port 1812, one can use the following configuration
The RADIUS Secret specified is the same “testing456” indicated in file /etc/freeradius/clients.conf. Similarly, the RADIUS Admin Filter-Id is the same “ntopAdmin” specified in file /etc/freeradius/users.