
We have designed the ntop Cloud as a way to securely interconnect customer applications deployed across hosts in heterogeneous environments not necessarily directly interconnected. Initially the goal of ntop Cloud is to enable users to administer easily these applications, update/restart/stop/start them with a mouse click, reconfigure them, and supervise their activities. Future SaaS (software as a service) features are planned but not a short term goals.
The idea is to simplify application deployment, check application status regardless of the physical network, detect restarts etc. things that before the ntop Cloud you would do in a more complicated fashion (e.g. connecting via SSH to hosts where those application run). For instance a typical example is nProbe and n2disk running on a datacenter and ntopng deployed on a laptop interconnected with public Wi-Fi connectivity. Those instances cannot speak directly unless a VPN is used, but in general IP address can be dynamic and so connecting to applications cannot be simple. With ntop Cloud you can do this with a mouse click as shown below.
DISCLAIMER: the ntop Cloud is still under development and if you want to use it, you need to use a recent version of ntop apps from the dev branch (non stable).
The first thing to do is to register to the ntop Cloud by connecting to cloud.ntop.org.
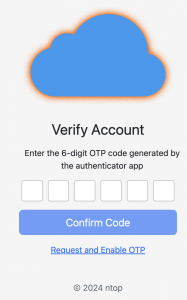
and registering your account. As described on a previous post, the ntop Cloud is designed for security hence all the modern features such as double-encryption, 2FA (Two Factor Authentication) and user walled garden are implemented to make sure nobody but the user can connect to its instances.
After the initial login, unless you have not yet configured your ntop Cloud, you need to click on the left menubar and download the cloud.conf file.
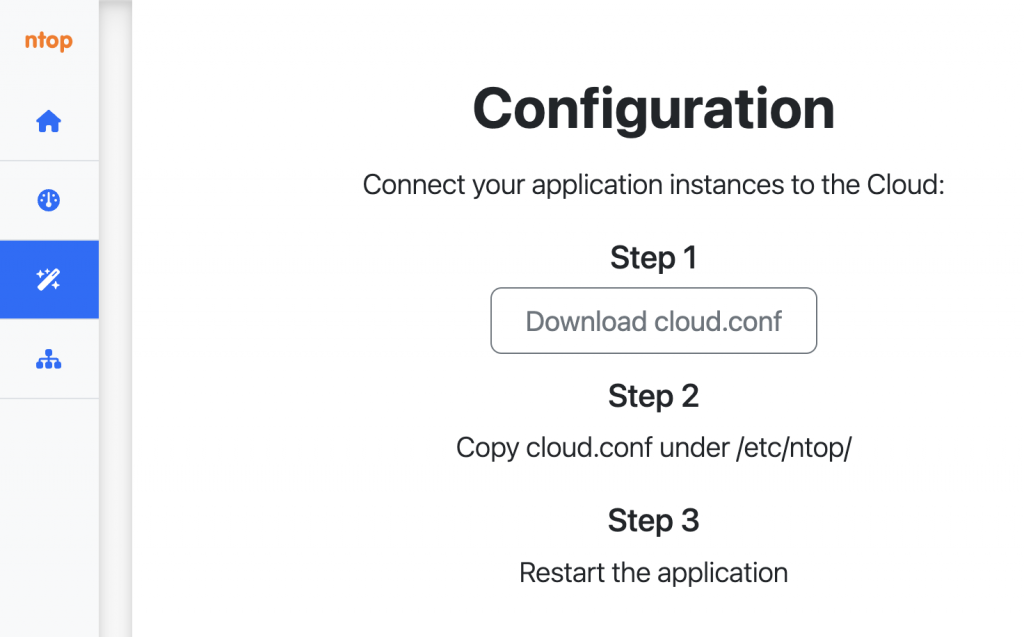
This file needs to be installed on all the hosts on which you use ntop applications (again from the dev branch for the time being). The installation is simple:
$ sudo su
# mkdir /etc/ntop
# cp cloud.conf /etc/ntop
If you want to name the node on which your apps are running, you can also create a file as shown below that contains a custom node name. Done that you can restart the ntop applications in order to make them aware of the cloud configuration. This step needs to be performed once and all the ntop apps (running on the same host0 will be automatically aware of the cloud without custom application configuration.
$ cat cloud_node.conf
{"instance_name":"www.ntop.org"}

You can check if the configuration with the cloud is established by looking at the logs or in ntopng looking at the top menu bar: a green icon means that everything is setup correctly, a red icon means that either you are disconnected from the cloud or the cloud configuration is not yet completed.
Once you have configured your applications, you can go back to cloud.ntop.org and see them in the web GUI
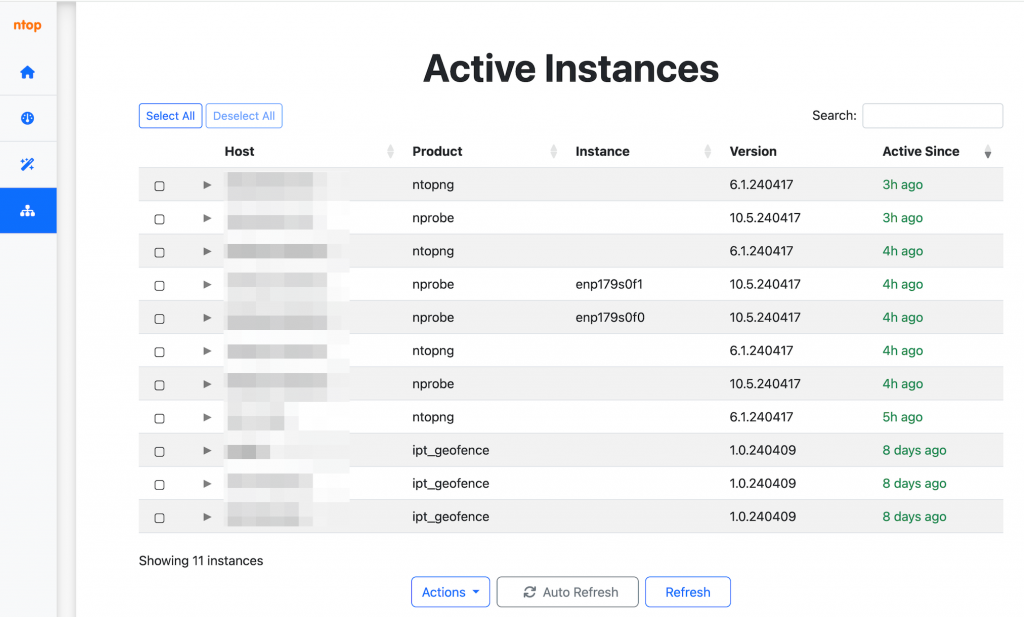
At this point you can perform actions such as update or restart on your instances. As said the ntop Cloud (including the cloud console) is still under development: your feedback is important in order us to fix the glitches you will encounter.
Enjoy !